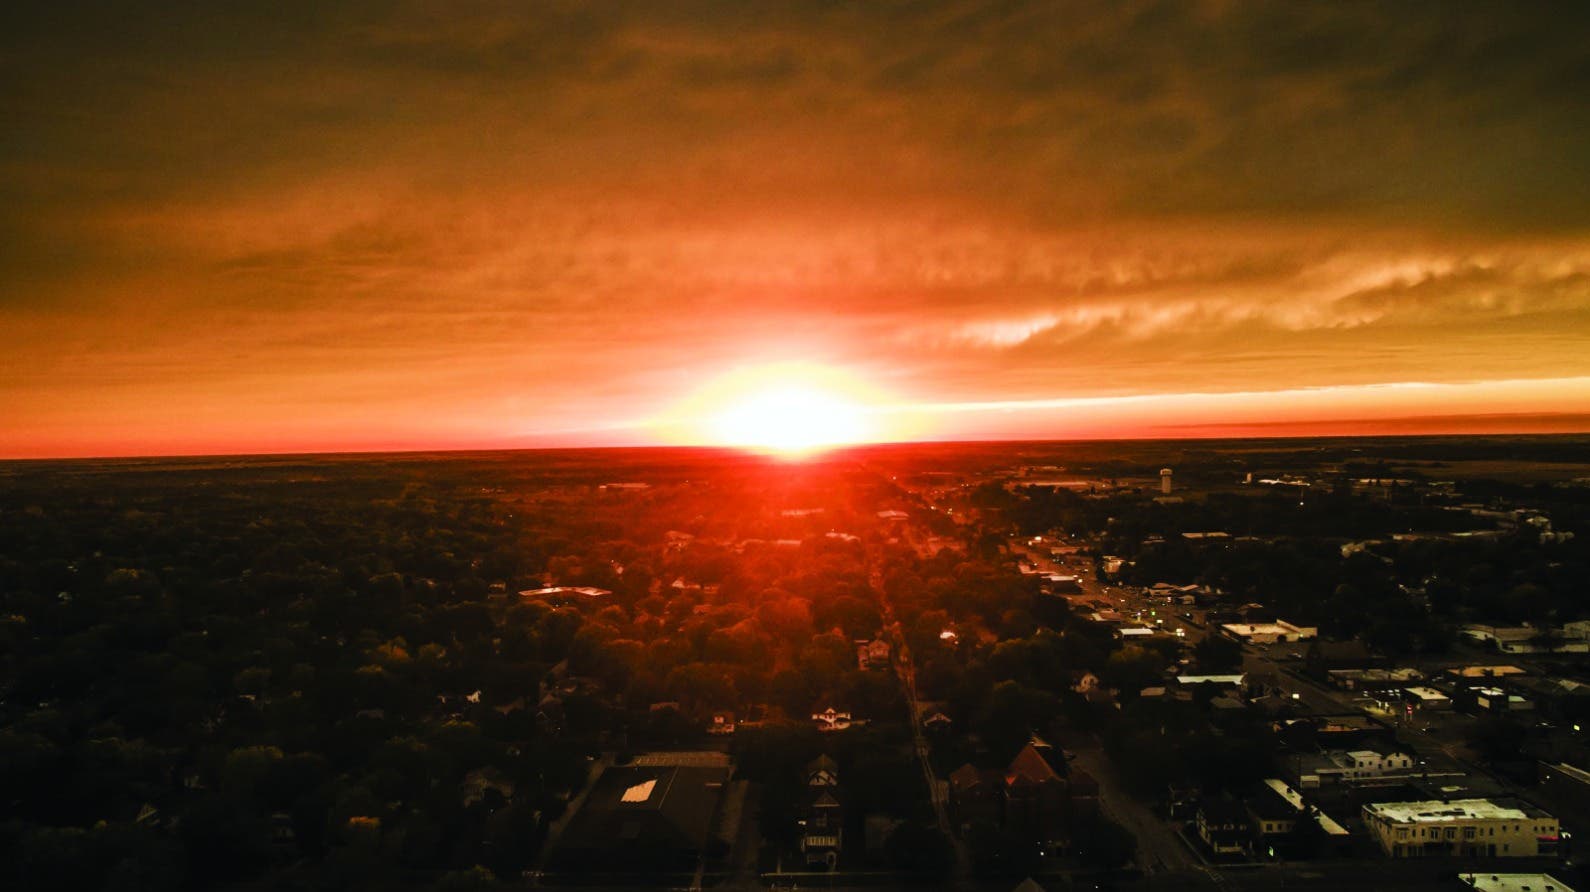
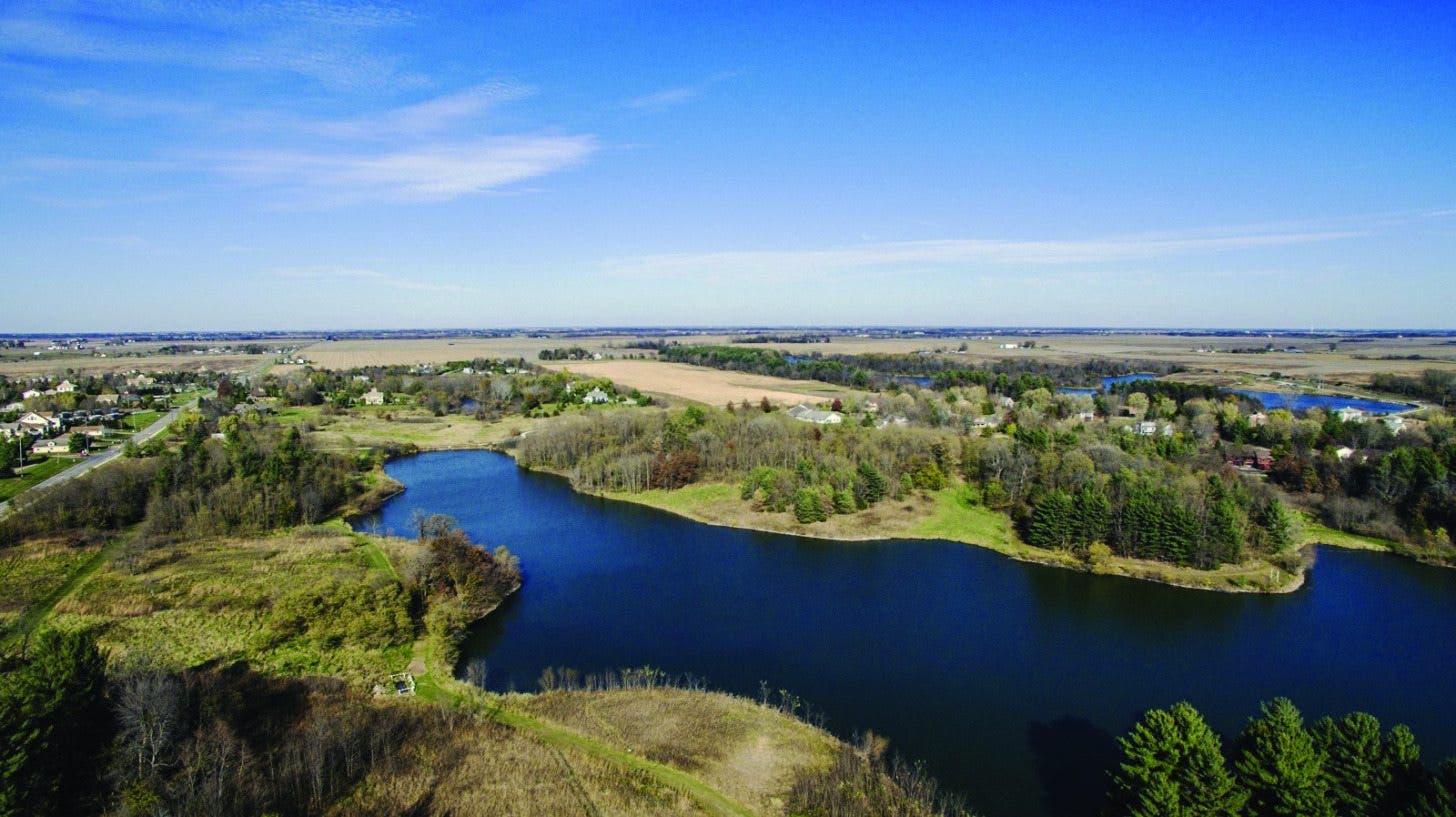
Drones are intimidating. Whether it’s the loud roar of the propellers or just the mere idea that you are actually controlling an unmanned aircraft (something that just a few years ago sounded like science fiction), using drones to capture aerial photos can be quite overwhelming. But fear not, cautious ones! It’s actually very easy to get beautiful drone photos and video every time that you fly.
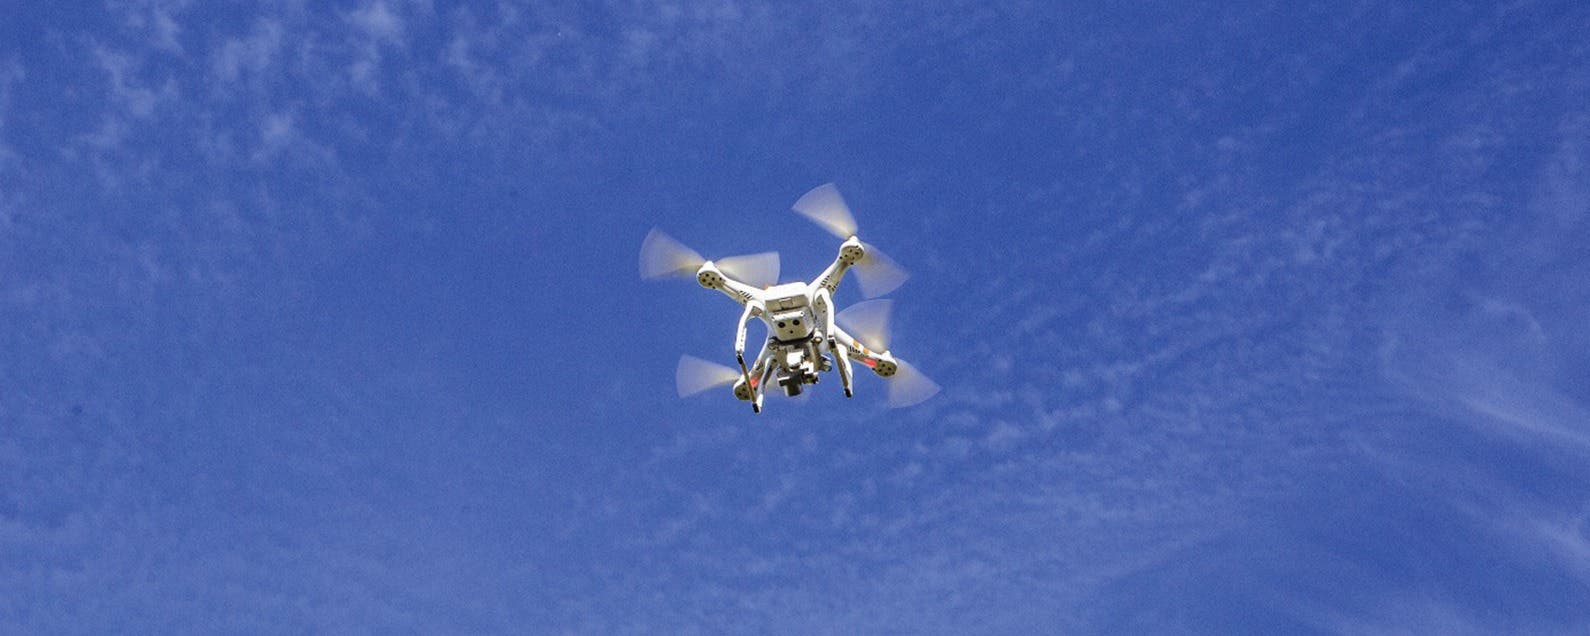
In this article, I’m going to show you some of the basics of how to use the DJI Phantom 3 drone ($799). I chose the Phantom because, in my opinion, it's the best drone for aerial photography. You don't sacrifice flight ability for photo quality. Phantoms are also built very well. I've heard stories of insane crashes due to user negligence and the Phantom lived to fly another day. It's the best drone on the market and has the best camera-to-drone ratio of quality that I've seen or used.
Step One: Download the DJI Go App and Connect to the Phantom Network
Setting up the DJI Go app is the easiest part of the whole process. The Phantom and the iPhone have a seamless relationship that is unparalleled by any of Apple’s competitors. I have used quite a few phones to fly mine and have been the most impressed with the iPhone’s ease of use and reliability.

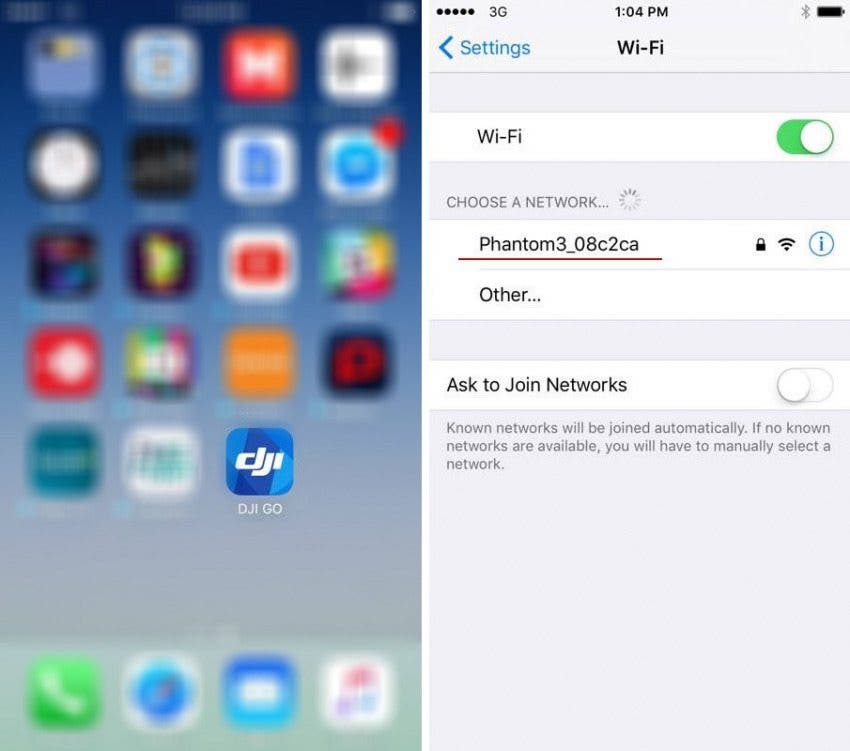
The Phantom will appear in your Wi-Fi settings. Just make sure to connect to the network before launching the app. The default password is: 12341234
Step Two: Calibrate Your Drone
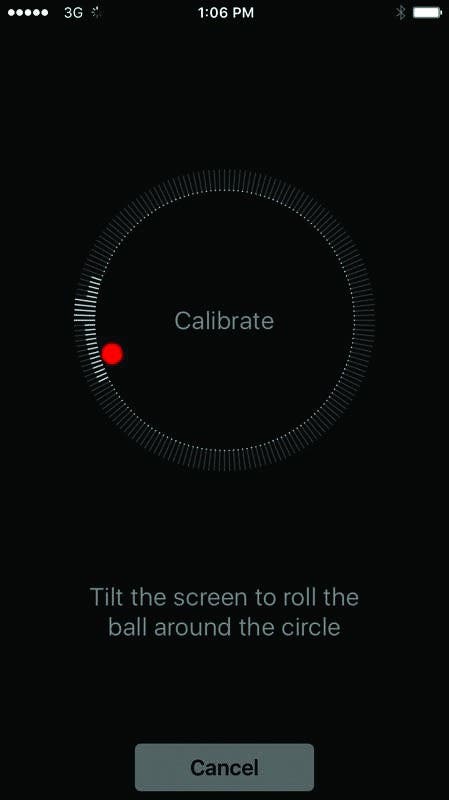
Once connected, launch the app and follow the automatic calibration process by slowly turning your drone in a full circle. This will cut down on post-production work and even out the orientation of the image. It will take less than a minute to complete this step and you only have to do it once (though I suggest calibrating it yourself every once in a while).
Step Three: Adjust the Settings
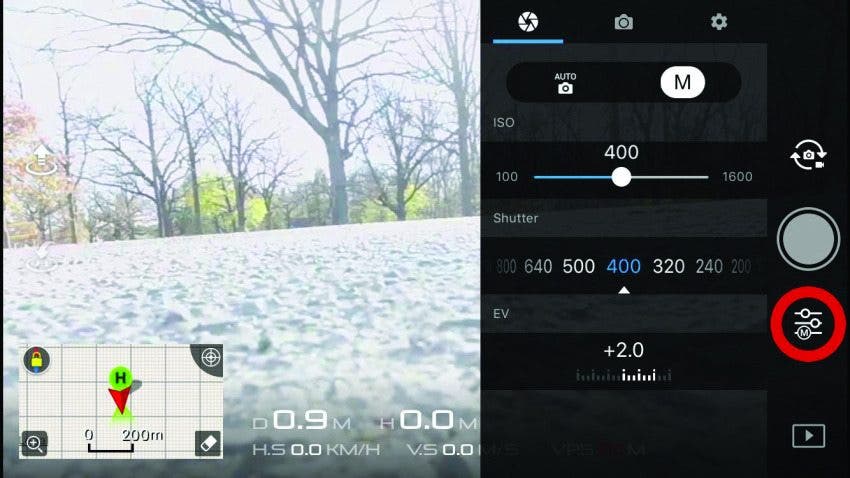
Adjusting your drone’s settings using the iPhone app is crucial if you want your images to pop. I suggest doing this prior to take-off, but you can also adjust your settings when in the air. The menu is very simple and consists of three sub-menus that are easily accessiblee.
What the Settings Mean:
ISO — ISO measures the sensitivity of an image sensor. The sensor in the Phantom is very small and delicate and I would not suggest ever going above an ISO of 400. Anything more and your image will look very grainy, muddy, and unappealing. You can go higher if you choose, but be aware that the images won’t look as nice as they would otherwise.
Shutter Speed —Shutter speed measures how long your shutter is open. The higher the number, the faster the shutter snaps and the crisper your photo will appear. There is no ideal shutter speed, but the general rule of thumb is that the higher you can set it while maintaining a bright image, the better. If you are shooting photos, this is even less of a concern. I try to keep my shutter speed above 200 just to play it safe, but I have gone far lower and still produced nice, crisp images.
EV (Exposure Value) — EV lets you compensate for the relationship between the shutter speed and the ISO. Anything on the plus side of the spectrum will brighten up the image and on the negative side will darken it. I try to get a nice balance without messing with the EV all that much.

ISO 400
ISO 100
Step Four: Register Your Drone with FAA
The Federal Aviation Administration mandates that you register your DJI drone with them so they can track all unmanned aircraft as a safety precaution. You’ll have to pay $5, renew every three years, and you must be at least 13 years of age.
Step Five: Launch Your Drone
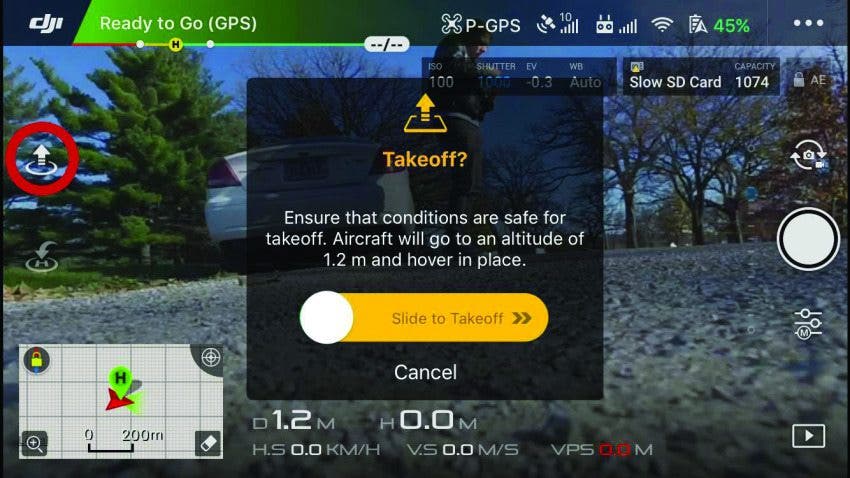
This is where things start to get fun. On the left side of the menu, you will see an arrow pointing to the sky. Press it and use the controller to reach your preferred altitude.
Note: Your Phantom will not launch on a bed of grass or anywhere else that touches the camera gimbal at all. This is mildly frustrating if you are out in a field or somewhere that doesn’t have a sidewalk, so you might have to get a little creative with your launch spots. I have even launched from the roof of my car when there were no other available spots.
The Phantom 3 4k boasts a maximum altitude of nearly 400 feet, but I’ve found that anywhere above 300 feet will result in a glitchy interface and unresponsive app, so be very cognizant of this in your flights.
Step Six: Start Snapping
There are two ways to take a drone photo on the Phantom. The first is with your iPhone and is done almost exactly the same way as your default Camera app.
The second is by pressing the gray shutter button on the right side of the Phantom’s controller. If you want to shoot aerial video, there is also a convenient record button on the opposite side marked with a red circle.
Step Seven: Landing

The Phantom can fly for roughly 25 minutes on a single charge. When you think that you are satisfied with your shots and wish to land your aircraft, there is a handy button pictured above that will help you ease it to the exact location that it took off from.
When the camera is about ten feet above the ground, lessen your pull on the trigger and gently guide it back to the ground. Honestly, I have accidentally landed my Phantom very hard on multiple occasions and the drone has always lived to fly another day, but it is very nerve-wracking when it happens and I would suggest being very gentle with your landings.
That’s It!
Your iPhone will automatically save low-resolution versions of your drone videos and photos to a specified folder, but the RAW images will be stored on the micro-SD card inside the Phantom itself. Simply eject the card and load your high-resolution images to your computer for viewing.
Remember to get creative with it and try different methods and settings. You will be pleasantly surprised at just how easy it is to use once you’ve flown it only a handful of times.